
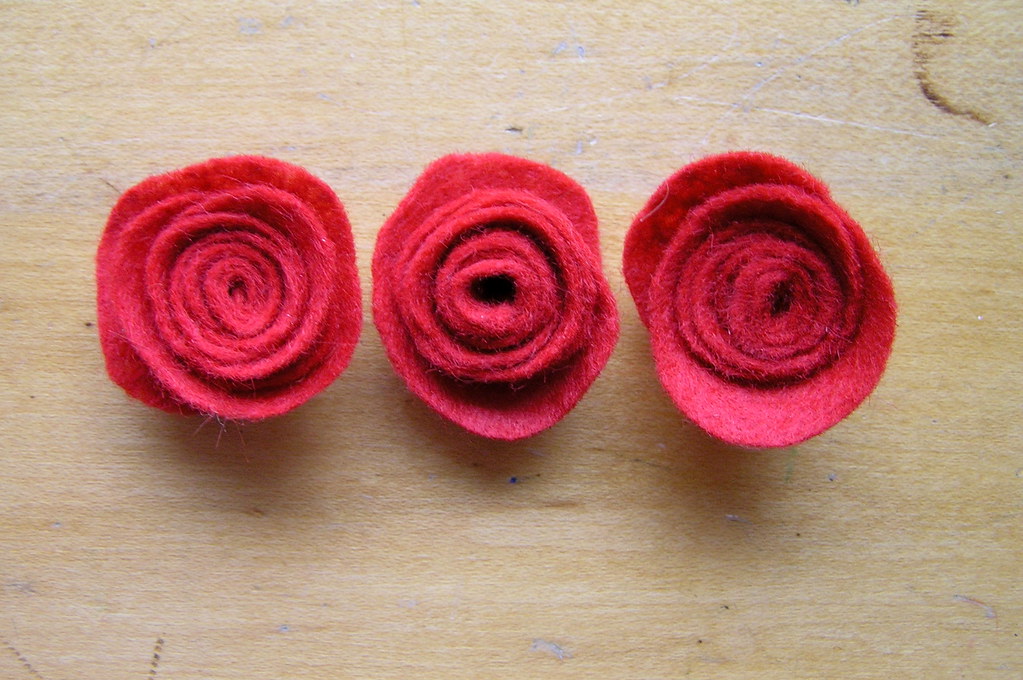
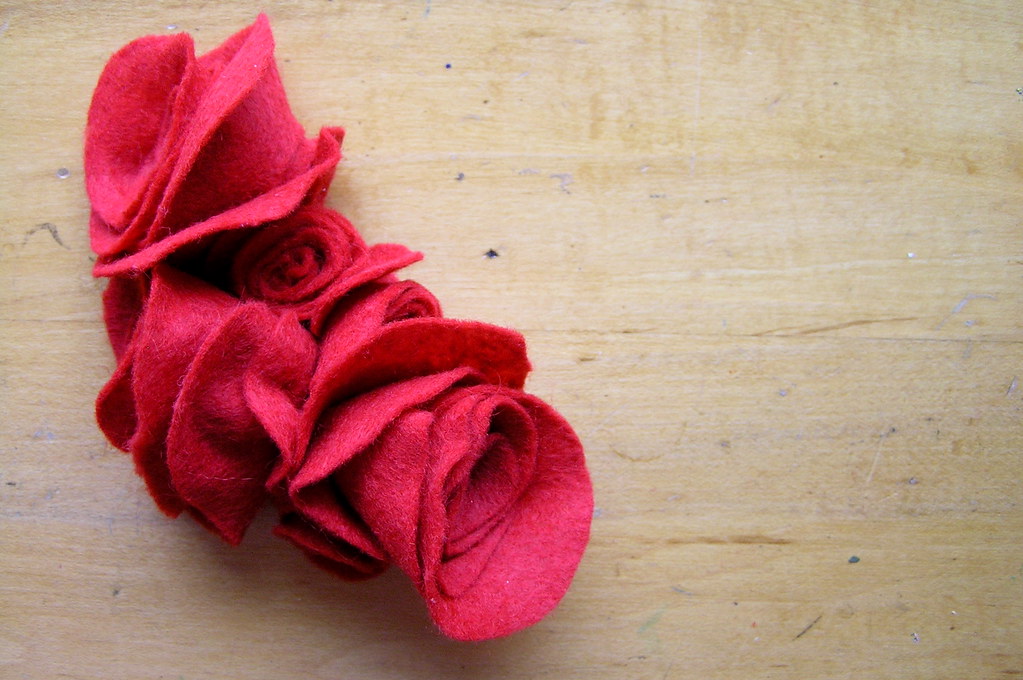
i am smitten.
smitten with these gorgeous roses.
they are fabulous, no?

do you want to make these beauties? okay, here's how:
materials needed:
felt - cut into squares, various sizes
scissors
chalk or water soluble fabric pen
needle and coordinating thread or felt glue
pins, branches, etc.
total time will depend on the finished project you decide upon. but one basic rose only takes me a few minutes.

allright, start with your square of felt. i used basic acrylic felt from the kiddos stash since this was new for me. (no need to practice on my nice wool felt that my sister gave me at christmas and i am hoarding until i find the best use. anyone else do that with fabric and such? sometimes cutting into it is so hard.)

draw a spiral. no need for perfection. in fact the wavier, the better. you'll see.
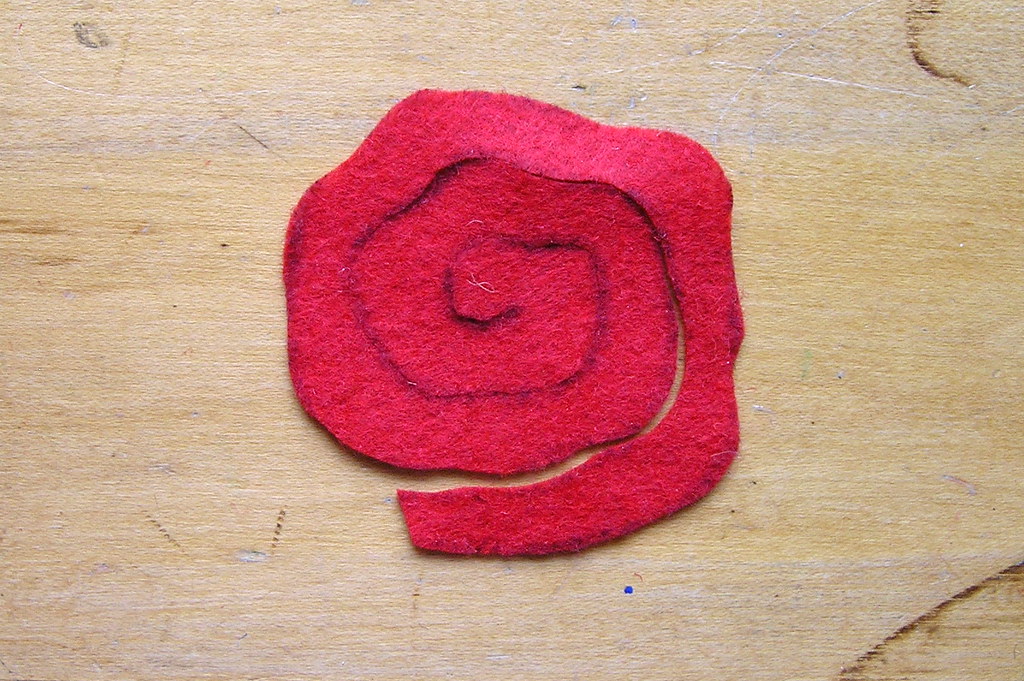
cut the spiral. sharp scissors are a must.
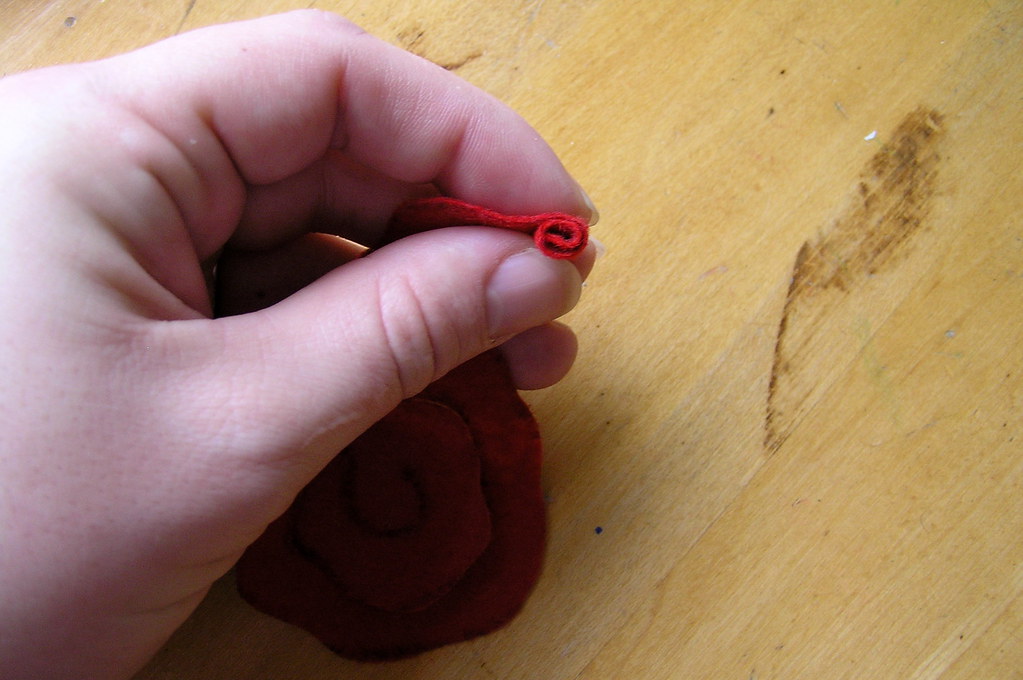
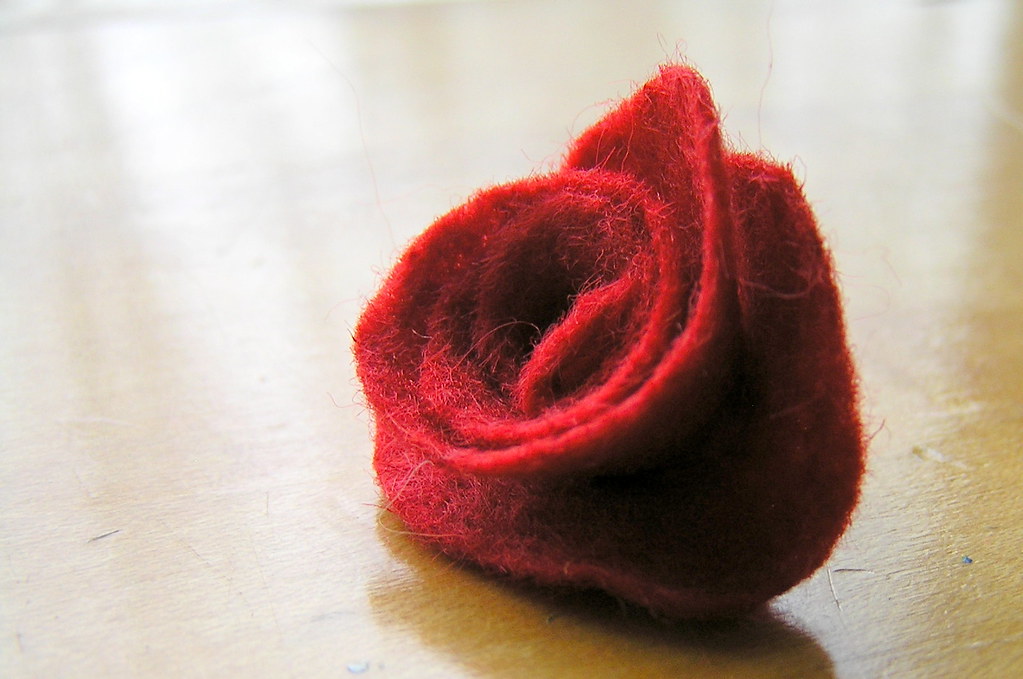
roll up your spiral starting at the outside. i played around with this part a few times trying to decide what i liked best. for some i went a little tighter, some looser.
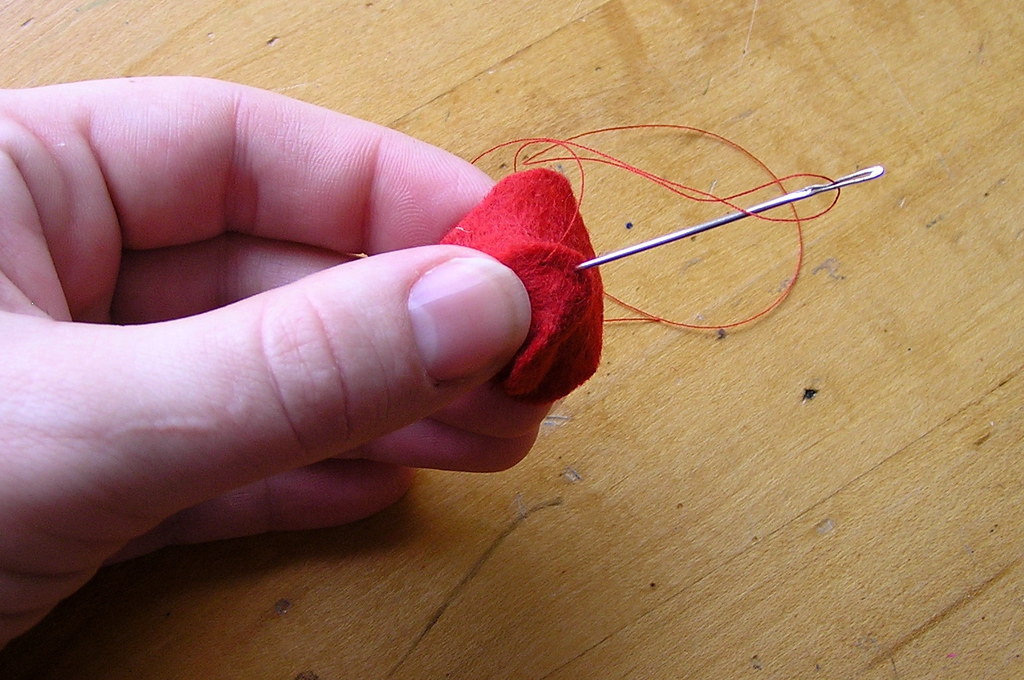
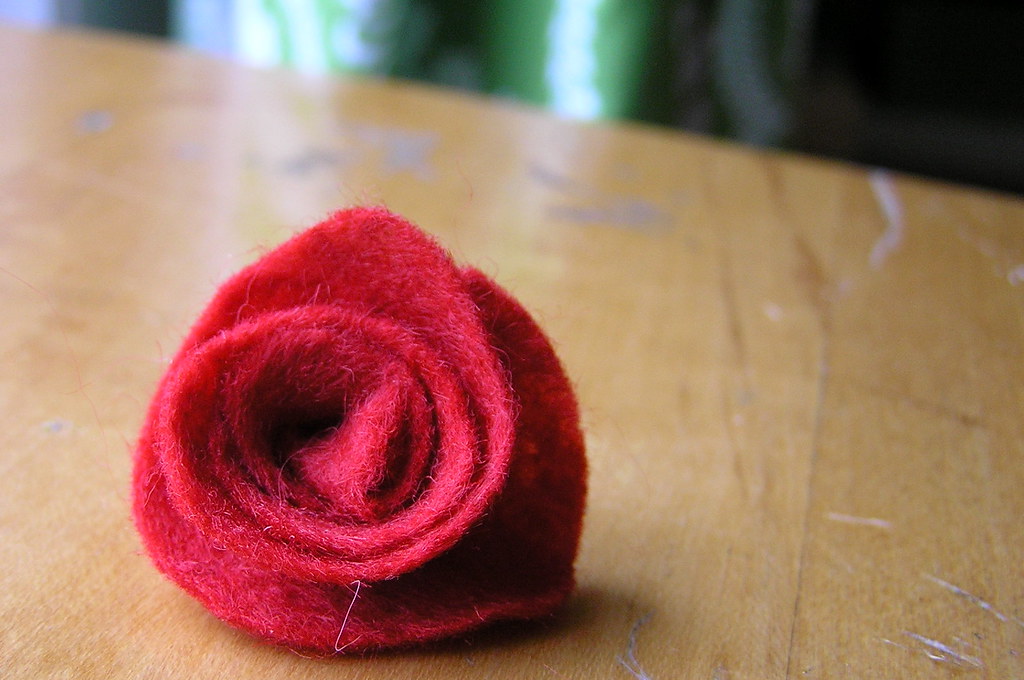
if using needle and thread, sew the botttom to hold the shape now. this is what i did. if you prefer glue, you might need to dab it along the bottom during the rolling process. in fact, i bet both would work well together. but i don't have any felt glue on hand. and i am being frugal (meaning i have no/little money to spend on these gifts).
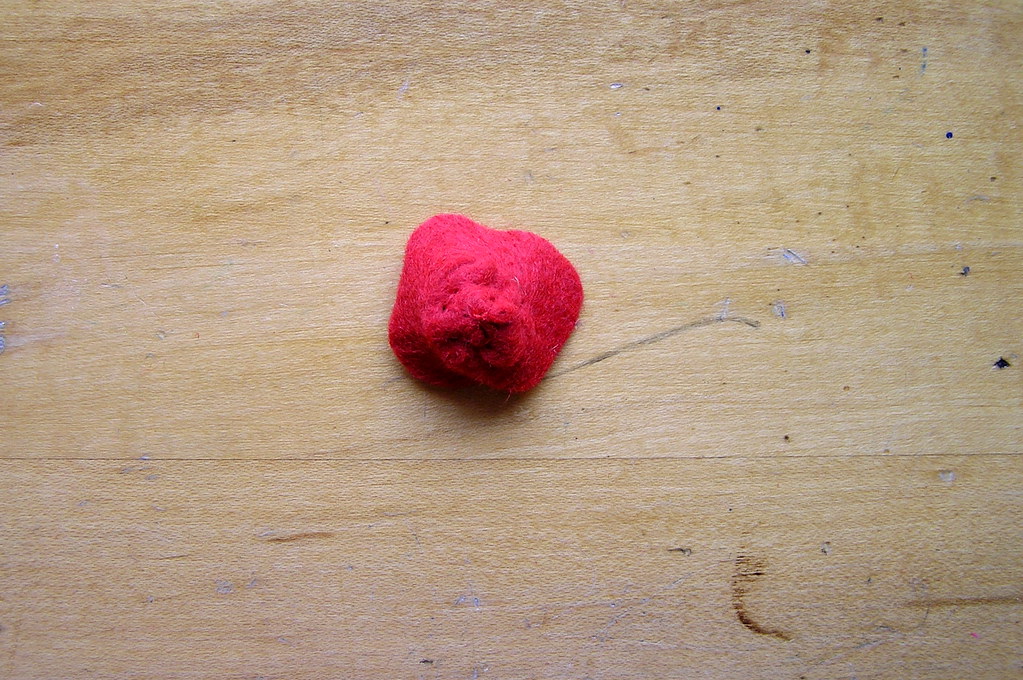
here is what it looks like when sewn.
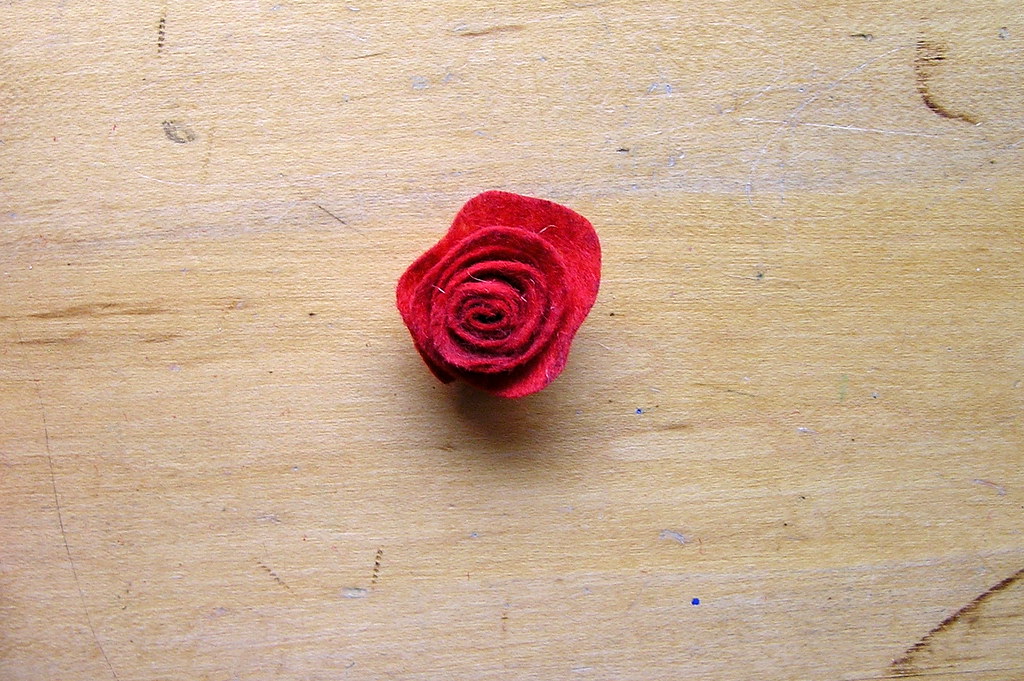
voila! a finished rose.
but, you are not finished. what will you do with your rose? i have a few ideas. attach them to a hairclip or headband. cute for the young and young-at-heart. or scatter them on branches. a nice alternative to buying someone flowers. you men could easily make these for your favorite girl. think about how much money you would save.
or make a corsage. loving this. in about two hours last night, i made this pretty pretty thing. let me tell you how. (i planned on photos for this part too, but the sun went away and they were all blurry. maybe i will add them later? okay, thanks for understanding.)
- arrange roses in a group to your liking. secure with straight pins, then sew together.
- cut two identical felt circles/ovals for your backing.
- straight pin one to the back of your grouping and sew on to the roses.
- now sew a safety pin to the second piece of backing. i would use two for bigger corsages to keep them from moving.
- sew this second piece of backing to the first (which is now attached to the rose grouping).
- and, once again, voila!
add some flair to a simple t-shirt, jacket lapel, pillow, purse - let your imagination take you to pretty pretty places.
isn't this homemade gift thing fun? happy crafting this weekend!
xoxo,
annalea
annalea

11 comments:
Very cool idea...i wondered how to make them! And i have felt within my reach and will make a few right now!
Beautiful! And wonderful tutorial. I can definitely do this :)
Thanks for showing this method I love it and plan to make some today. I'm enjoying your blog. Come visit me. Nan
Very cute roses. I have been making a lot of fabric flower necklaces (hopefully for an etsy store very soon) and I will have to try these too. Thanks for sharing how to make them. I am a new follower btw. Can't wait for more projects.
this is a cute variation of what Lolly Chops did.. nice job.
I love how you sewed the bottoms together! So clever!!!!
love, love, love these sweet roses! Thanks for sharing.
Peace,
Jennifer
love, love, love these sweet roses! Thanks for sharing.
Peace,
Jennifer
These are so cute. I've seen them twice in the last couple days. since we missed our Valentine opportunity I think we should make these for St. Patrick's day in green! :)
these are SO cute! i found your images on flickr and had to share this project and your embroidered burlap on my blog.
i can't wait to try for myself!
These are so nice! I have a couple nieces that are having birthdays and we're making hair accessories for their gift. This is a perfect gift tie on hair clip. Thanks. I also featured this craft on my blog with a link back to your blog.
Post a Comment
hey there. i love to read your comments! thanks for stopping by!