Showing posts with label tutorials. Show all posts

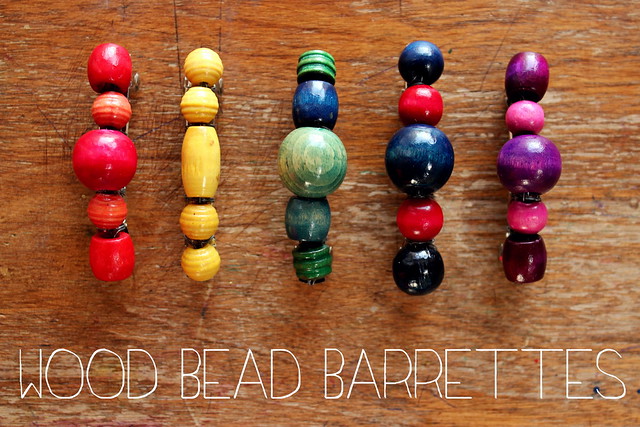
handmade giving - wood bead barrettes

wood bead barrettes

happy wednesday, folks!  i am over at la famille today with a simple, quick, but oh so good tutorial for wood bead barrettes.  alicia is one of my favorites and it won't take long over at her place to see why.  and this handmade giving series she is running is chock full of lovely ideas for all sorts of people in your life.  go take a look if you are still in need of christmas gift inspiration or pin away for future occasions.  happy making and giving!

xoxo,
annalea
 

last of autumn wreath

autumn wreath
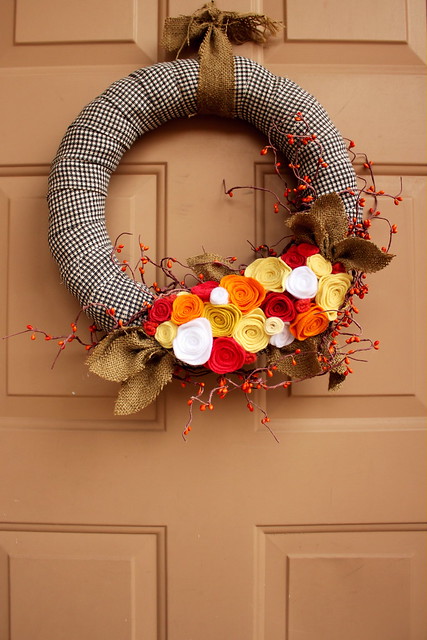
before we officially plunge into christmas/winter mode, i thought i would share some details on my autumn wreath now gracing the front door.  i waited on this post, because we have been hoping our landlord will let us repaint the front door turquoise - which is so very new mexican - but no word back yet on the approval.  so can you just imagine this wreath sitting on a turquoise door?  okay, thanks.

autumn wreath
also, this is not a true tutorial.  there are so many wreath DIYs out there and this was a dipping-my-toes-back-in-the-creative-water type project.  but here are the quick details:  

one straw wreath without the plastic wrap removed
2" strips of fabric wrapped around it
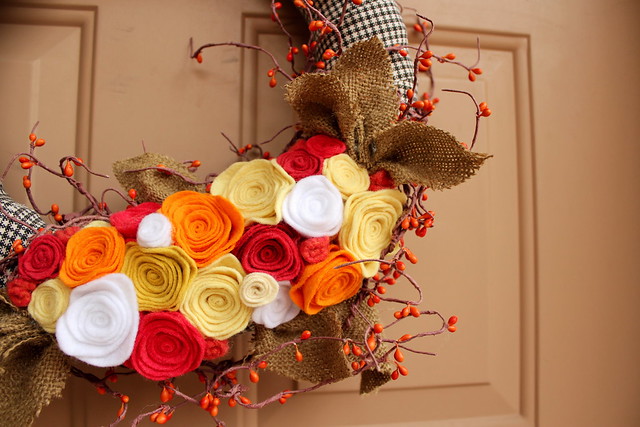
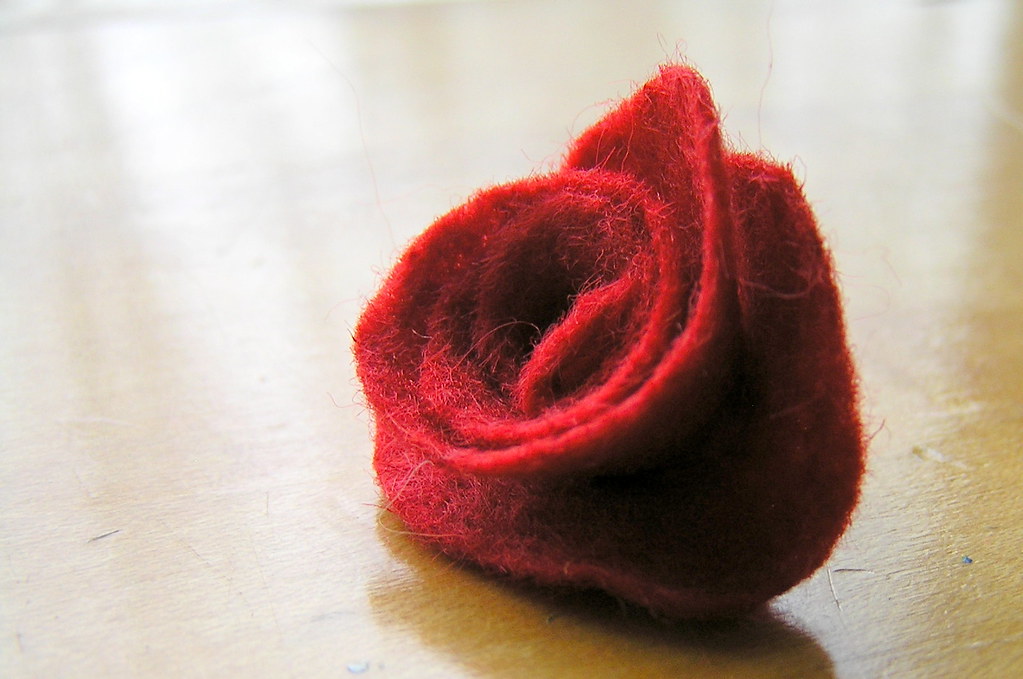
lots and lots of felt roses hot glued to the bottom, as well as a few rolled wool buds
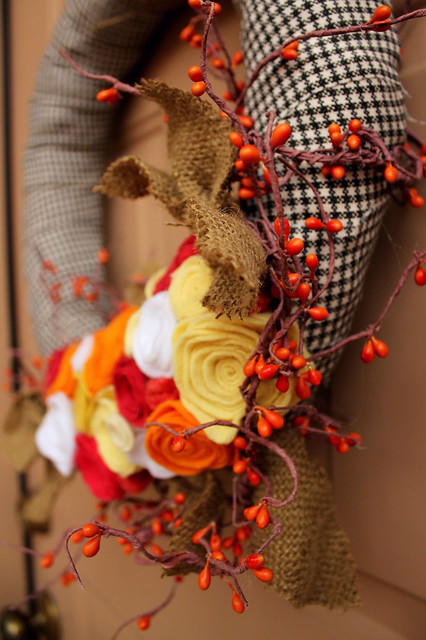
add in some orange berries i found in the stash
burlap leaves tucked here and there
and a strip of burlap to tie the wreath up on the door

without counting time to make the flowers (which i had premade a couple years ago when i was still selling on etsy), the wreath took me maybe an hour.  and that is with kiddos afoot.  plus needing to pull out and choose the materials.  it was such a breath of fresh crafty air in our full homeschooling days.  i need to remember it is okay to do that.

autumn wreath
i do like my house to feel decidedly autumnish through thanksgiving, so i have another week with this pretty thing.  but, yes, i have begun some christmas crafting in preparation for a total house swap next friday.

how about you?  is your tree already up and the christmas music a'playing?  or will you wait until next weekend?  

simple pendant light diy

simple pendant diy
the need for better lighting over our piano has become more obvious with the shorter days.  practice in the evenings after dusk was not happening.  combine that with my deep desire to not spend any unnecessary money (did i mention i even cut my own hair last week?) and this simple diy was born.  it as completely free (except i need to replace the edison bulb i stole from another lamp) and was super fast.  those are my favorite kind of solutions.  especially when they produce something nice to look at.

might just be solving the piano lighting issue without spending a dime #myfavoritekindofsolution
the hemma cord from ikea was used in my old illinois studio space, but has been gathering dust since the move.  and the gold krylon paint pen was thrifted (unopened) with lots of other crafting goodies for my stash by my grandmother a while back.  all i did was paint the black plastic.  simple and fast.  three coats later and voila!  taping off the cord near the plastic would have been good, but i was able to scrub away the gold smudges.

simple pendant diy
simple pendant diy
simple pendant diy
i remember thinking the cord length was ridiculously long in the past.  but it is absolutely just right for our tall ceilings here.  i apologize, ikea, for my shortsightedness.  we screwed in two mug hooks to one of the ceiling beams and attached the included cord clips.  the cord is lightweight with just an exposed bulb and didn't need anything else for support.

simple pendant diy
simple pendant diy
simple pendant diy
the pendant also has very little visual weight, which i think pairs nicely with my grandfather's painting and jesse's guitar.  i also like having the space on top of the piano free when our teacher comes for lessons.  or when i need a place to set keys and such while getting ready to leave.  or when all other spots are covered with school books and paperwork, but i still have one more pile needing a home.

simple pendant diy
simple pendant diy
The new piano light! #loveloveloveit #itisbrighterthanitlooks
the new light has made such a difference.  like moths to a flame, the kiddos have taken to playing at night again.  (and it is much brighter than the above photo appears.  but not too bright that the shade-less bulb is annoying.  a happy medium of brightness.)

have you made up any simple and fast hacks lately?  don't keep them to yourself! share and inspire, friends.
xoxo,
annalea

i am joining the nester and will be blogging every single day in october! 
full list of posts here.

how to make dried orangeaments

dried orangeaments

i am smitten with the stained glass effect of our dried orange slice ornaments (aka orangements).  this is the first year i have attempted this project and the results did not disappoint.  i am continually drawn to natural christmas decorations and love finding new ways to bring handmade beauty into our home.

dried orangeaments
slice your oranges thinly and arrange on a baking sheet.  bake a few hours in a low temp oven (150-200 degrees), turning occasionally.  our first batch burned when left in too long.  it is a learning experience, right?

on a side note, i took the unbaked round ends of each orange and have been simmering them with cinnamon sticks and cloves.  this casita smells delicious!

dried orangeaments
dried orangeaments
dried orangeaments
it is pretty simple to add the string.  after cutting 5-6 inches of thread, i poked it through the dried fruit, under the hardened peel, and then back a few millimeters over.  a couple of knots later and voila!

i would like to make some with twine and perhaps some ornate ribbons too.  but this year i am keeping things visually calm to counterbalance the craziness of these past 6 months.

dried orangeaments
the subtle orange aroma + the gorgeous orange among the greens = a happy orange-loving me
i have yet to finish hanging them all over the tree - stay tuned for that photo update soon.
dried orangeaments
but i also like the idea of stringing some together for a mini orangeament garland.  they look particularly pretty hung in a window with that winter light streaming through.

tell me, what natural winter decor do you like to incorporate at home?  
this last week, i have also been working on assembling simple green wreaths from tree cuttings and cranberry-popcorn garlands.  last year we made cinnamon-applesauce dough ornaments (which i can't find since the move!).  any new ideas for the harts to try?  or anything you want me to share with y'all?

dried orangeaments

how to make a make a rainbow felt mobile

since i finally cleaned our entryway, the mobile adorned window seems that much cheerier and  i thought i would share this simple little project here.  (it was originally posted over at kojo designs back in march.)

and. . .wahoo! it's saturday night!

*******************************

I am an avid DeStasher.  Almost every project I make comes from something on hand.  But that doesn't mean my storage bins and baskets aren't overflowing.  I have a funny way of keeping every little scrap of material.  This series was made for girls like me. 

rainbow felt mobile

I like spring cleaning. There is something refreshing about scrubbing clean the corners of each room, emptying out closets of winter accoutrement and giving the house a good airing.

But I struggle with a common crafter's ailment: Stash Hoarding.  My love for spring cleaning fails me here.  I can't get rid of these supplies!  I might be able to use them someday!

Well, I am slowly learning that someday just might be today.  That's when I force myself to pull out those carefully stashed goodies and create.   

time to destash

I recently came across this drawer of wool felt scraps, leftovers from many a felt rose, and I knew that it was their time. (And I couldn't fit any more scraps inside.)  So I dumped out the contents and started sorting.

rainbow scraps

I began to separate colors.  Oooh, pretty rainbow.  Most of these scraps had a corner shape in common.  Inspiration was building.

rainbow scraps

I cut the scraps into tidy, but not too perfect, triangles.

rainbow spools

Next up, I ran the triangles through my sewing machine.  I tried to vary up the shade and size, but again, not making anything too exact.  I wanted this to balance the geometric shape with an organic feel.

I ended up with seven colorful garlands and tied them to a yarn wrapped wire hanger.  Originally I envisioned hanging this mobile in front of a window for a curtain-y effect.  The rich wool looks oh-so-lovely in the sunlight.  But this would brighten up any spot in your home.  I am picturing it over a crib.  Or in front of a mirror.  You know, for a double rainbow effect.

rainbow felt mobile

Happy DeStashing!

how to make our favorite iced coffee

our favorite iced coffee

in late april, jesse began a new mission: perfect a recipe for iced coffee.  and boy was he serious about it.  after much research and experimenting, this is what we settled on.  i have handed out this recipe dozens of times since then. 

guests leave our home wanting more.
it is really that tasty.  not to mention super simple and ridiculously cheap.

ingredients used:
1 1/2 cups ground coffee
12 cups water
2 small cans sweetened condensed milk

first, mix the coffee grounds with 6 cups of water.  stir, cover, and let the mixture brew for 8-12 hours.  (we keep ours on the kitchen counter.)

then we pour this mixture through our coffee maker.  straight down the filter.  it takes awhile, about 10 minutes or so.  if this won't work for you, you could pour it through a filter or cheescloth set in a strainer.  but that was messier for me.

once filtered, you have a concentrate, which we transfer from our regular coffee pot to a pitcher.  now you add the remaining 6 cups of water.  and if you drink it black, you could be done.  but if you want the sweet goodness we drink here at casa hart, you'll want to crack open those cans of sweetened condensed milk and pour them into your pitcher.  (we have been using the low-fat kind.)  mix well and you now have yummy iced coffee at the ready in your fridge. 

sweet and light, just how we like it. 

when serving, be sure to add some ice to your glass.  i think it cuts the creaminess of the coffee nicely and is a bit more refreshing on a hot day.

this gets me through morning swim practices and jesse through long days at the office.

our favorite iced coffee

and, yes, this was inspired by in the heights.  if you have seen it, you will know what i am talking about.

how to turn a favorite cardigan into a pillow

favorite cardi restyle

see this cardigan?  it was my favorite.  so well loved that one too many holes were worn into the neckline and hems.  even some unsightly discoloration on the sleeves and underarms.  it needed to be retired from my wardrobe.  so sad.

except maybe not.  instead of wasting this beautiful embroidery, i decided to upcycle it into a new pillow.  it only took a half hour from start to finish.  one of those projects that made me feel so productive, yet didn't leave me with a huge mess to clean up.  that makes me happy.

here is how i did it.

favorite cardi restyle

i began by measuring between seams on the back and cut a square using this width.  i keep a small stash of unused pillow forms (mostly grabbed from family when they are offloading stuff) and amazingly i had one that would fit.  it was a bit of a squeeze, but the knit stretched nicely. the embroidery was a little larger than this width, so i cut around it to avoid any unraveling.

i took this square and pinned it to the front (right sides together) and cut a second square.  because of the buttons, i just kept these two squares pinned and sewed up all four sides.  then i unbuttoned it and turned it right side out.  voila!  instant, removable (meaning washable!) pillow cover.

favorite cardi restyle

turning something unusable and making it something useful.  and beautiful!  love that.

favorite cardi restyle

turning it around to the other side looks just as pretty.  the hint of embroidery in the corner is sweetly understated.

favorite cardi restyle

this is the chair it has claimed as home for now.  and i think it looks just lovely there. 

now when a favorite cardigan is ready to retire from your wardrobe, you know what to do with it.  happy upcycling!

linking up to:

how to make snow ice cream

snow ice cream

today we tried something completely new.  and, goodness, am i glad we did have you ever made snow ice cream?  would you like to try?


ingredients needed:
freshly fallen snow (~ 1 gallon)
granulated sugar (~ 1 cup)
vanilla extract (~ 1 teaspoon)
milk ( ~ 2 cups)

(edit: i must have had quite the sweet tooth yesterday, because i believe 1 cup of sugar might be a bit much.  next time i will start with a 1/2 cup.  i don't think more than 3/4 cup will be needed.)

snow ice cream

set out a bowl to gather falling snow.  (or carefully brush some off a clean surface in the backyard, like i did.)

sprinkle sugar over the top.

snow ice cream

add vanilla extract.

snow ice cream

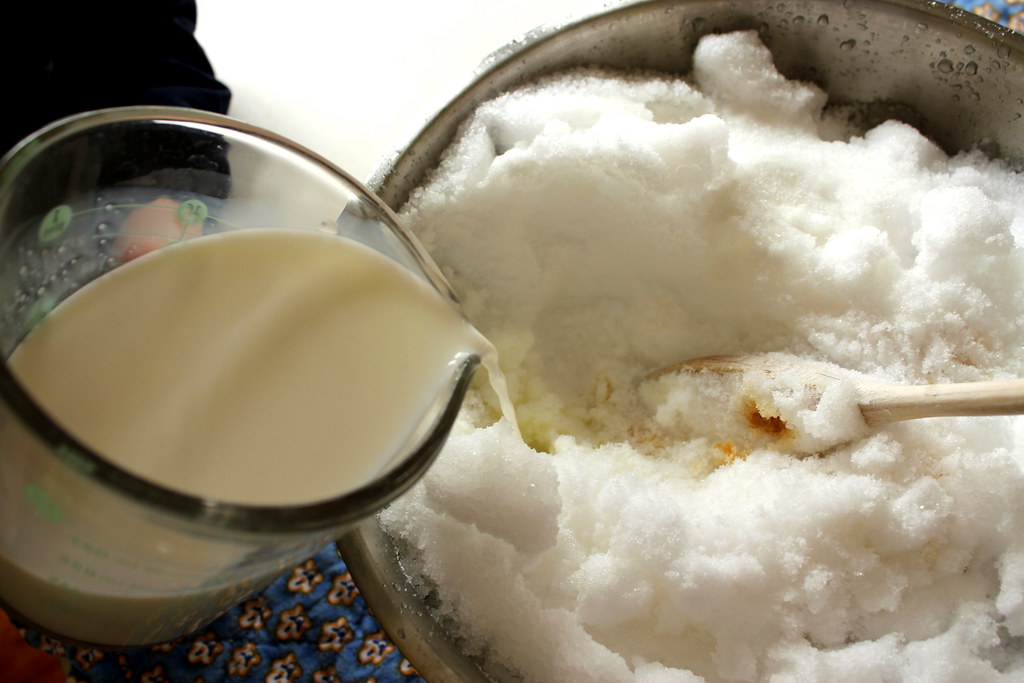
stir in the milk until creamy.

snow ice cream

it is so stinkin' easy.

snow ice cream

it looks so pretty in these bowls.

snow ice cream

and it is so so yummy.

snow ice cream

luca was shocked.  "why does it taste like real ice cream?"

snow ice cream

snow ice cream

i think that putting the ice cream in the freezer after mixing would be best, as it melted very quickly for us.  but since we had no patience for waiting, we just drank the last tasty bits.

snow ice cream

why have i never made snow ice cream before? this will definitely be a new yearly tradition.

(and yes jesse, we saved you some.  check the freezer!)

linking up to:
life made lovely
get your craft on
strut your stuff
show and tell
want to play? wednesdays
friday fun finds 
weekend wrap up party 
show and tell saturdays